bangle motif tutorial
I've had trouble getting online. Thanks Mobily!
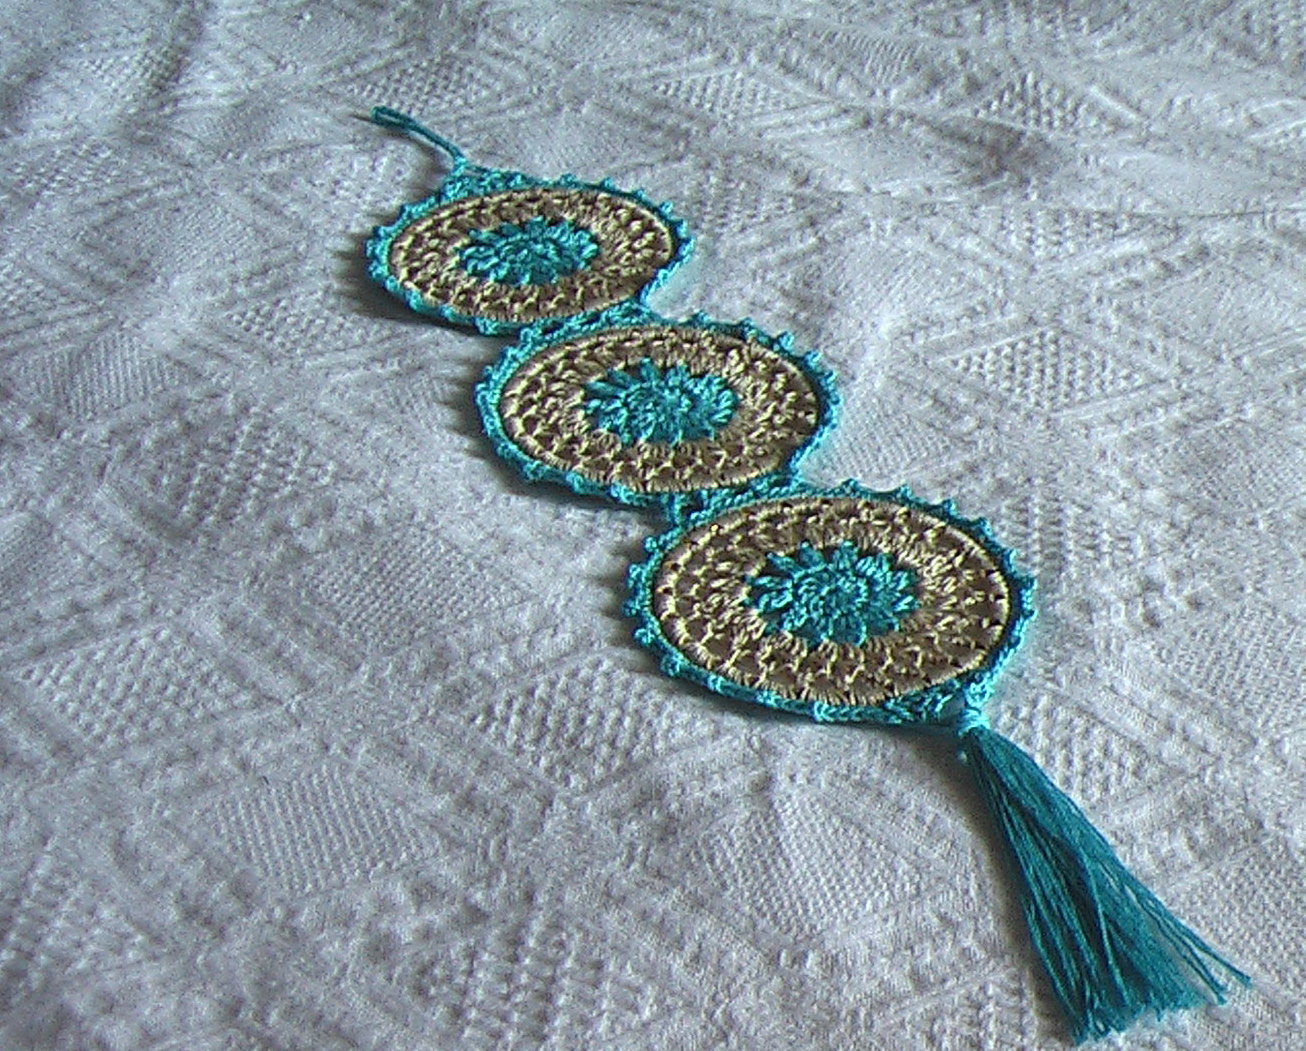
Finally, here's the tutorial for the bangle motif for Aysh and anyone else who might be interested. Of course there's a lot you can do with the basic bangle motif. I attached three to each other to make the wall hanging.
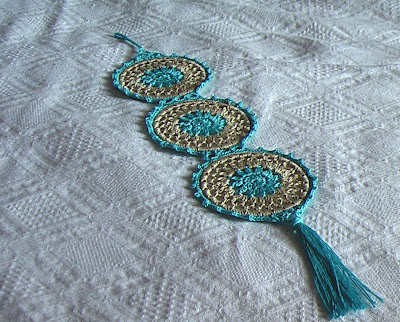
But I think it would look cool as a necklace or even earrings. So if you do crochet some, do let me know and leave a link. I'd love to see!
I used thrifted bangles, a 2 mm hook and some crochet cotton.

I started with a magic loop. I think this little technique is great for motifs where you really don't want a little (or even big) hole in the middle. It took me a while to get it though!
Magic loop

Pull up a loop from the long end of the thread.


Then yarn over (yo) and pull up another one to secure it.

Then work a double crochet (dc).

And 11 more, working over the short end of the thread.

When you have 12 dc, pull the short end of the thread. This is the "magic" bit.

Give it a good tug.

Then, slip stitch into the first dc.

No gaping hole in the middle!
Now for the rest of the pattern ...
Chain 2, [yo and pull up a loop in the same stitch, yo, pull through one loop] twice, yo, pull through all the loops on the hook.

Ch3, yo and pull up a loop in the next dc, yo, pull through one loop, [yo and pull up a loop in the same stitch, yo, pull through one loop] twice, yo, pull through all the loops on the hook. Continue working these cluster stitches in every dc around, with 3ch in between.

Join another colour if you like, and this time, you carry on with same stitches but you work 2 clusters in to each of the ch3 spaces.

My motif was a little bit smaller than the bangle at this point, so it was time to incorporate that bangle in to the pattern. Of course you can go bigger or smaller if you like but the motif shouldn't be the same size or bigger than the bangle that you're using. You want it to pull taut on the bangle. Start by pulling the long, working yarn through the bangle (to the back).

Ch1 and work 4 single crochets (sc) into the 3ch space from the previous round and the bangle too.

Keep working 4sc into each 3ch sp and around the bangle at the same time.


When you've finished working the round slip stitch in to the first sc. The sc in to each sc. I added a ch3 between every second and third sc in a 4sc group.


Finally, here's the tutorial for the bangle motif for Aysh and anyone else who might be interested. Of course there's a lot you can do with the basic bangle motif. I attached three to each other to make the wall hanging.
But I think it would look cool as a necklace or even earrings. So if you do crochet some, do let me know and leave a link. I'd love to see!
I used thrifted bangles, a 2 mm hook and some crochet cotton.

I started with a magic loop. I think this little technique is great for motifs where you really don't want a little (or even big) hole in the middle. It took me a while to get it though!
Magic loop

Pull up a loop from the long end of the thread.


Then yarn over (yo) and pull up another one to secure it.

Then work a double crochet (dc).

And 11 more, working over the short end of the thread.


Give it a good tug.

Then, slip stitch into the first dc.

No gaping hole in the middle!
Now for the rest of the pattern ...
Chain 2, [yo and pull up a loop in the same stitch, yo, pull through one loop] twice, yo, pull through all the loops on the hook.

Ch3, yo and pull up a loop in the next dc, yo, pull through one loop, [yo and pull up a loop in the same stitch, yo, pull through one loop] twice, yo, pull through all the loops on the hook. Continue working these cluster stitches in every dc around, with 3ch in between.

Join another colour if you like, and this time, you carry on with same stitches but you work 2 clusters in to each of the ch3 spaces.

My motif was a little bit smaller than the bangle at this point, so it was time to incorporate that bangle in to the pattern. Of course you can go bigger or smaller if you like but the motif shouldn't be the same size or bigger than the bangle that you're using. You want it to pull taut on the bangle. Start by pulling the long, working yarn through the bangle (to the back).

Ch1 and work 4 single crochets (sc) into the 3ch space from the previous round and the bangle too.

Keep working 4sc into each 3ch sp and around the bangle at the same time.


When you've finished working the round slip stitch in to the first sc. The sc in to each sc. I added a ch3 between every second and third sc in a 4sc group.


Any questions? Just let me know. And remember, I'd love to see what you make with the pattern.


12 comments:
yay....Im going to try this inshallah...thank you!
Thanks for the tutorial. Will have to consider the possibilities now and see what I could use this for.
Fiona x
this is pretty! going to see what bangles lay hidden in my dd's cupboard:) thanks for sharing
I Love it! Thank you and JAzakAllah. This is going to be my next project inshaAllah. It is so simple and easy but I dont think I'd have figured it out myuself if it wasnt for your tute. I did work on craft rings in tatting but never in crochet. are using a accessories bangle or is it a crafty thing. if crafty, where can i get it or what do i tell the sales person. :) thanks again.
Little Moments, can't wait to see yours!
Fiona, I'm sure you would come with some gorgeous jewellery! I'm thinking along the lines of crocheting the whole thing in silver!!!
Thank you, crochet nutcase.
Aysh, glad it helped. The bangles are very ordinary, metal ones that I bought at a charity bazaar!
What an awesome, cool, fun idea! I want to make a million of these. Digging up my bangles NOW.
oh masha`allah .... thats amazing
That is so pretty! I started a star flower crochet motif the other day and was looking for something round to add it into to make a necklace.....thrifted bangles of course! Thank you xx
Great idea! I just made my first one, with the help of your tutorial. It's looking good! Thanks :)
I had been wanting to try this for some time now and I finally tried it last night! I think my bangle was a little larger because I really had to stretch it out, but it's still pretty! I just uploaded it to flickr for you to see if you'd like. http://www.flickr.com/photos/emilywhy2011/6899641862/in/photostream
Thank you!
It looks beautiful ... Can't wait to try it out
It looks beautiful ... Can't wait to try it out
Post a Comment